Tuesday, December 16, 2014

How to YouTube

Here are four videos to get you started using YouTube for instructional videos, created either by you or by your students:

Part 1 - Logins, Channels, and Privacy


Part 2 - Uploading, Creating, Playlists


Part 3 - Editing Settings, Creating Captions


Part 4 - Student Submissions


Here is the link for the entire playlist, if you would prefer that: 


Friday, October 31, 2014

Control Your Email!

If you would like to take control of your overflowing email inbox, here are some strategies that work for me...

Part 1 - Introduction


Part 2 - Settings


Part 3 - Amnesty


Part 4 - Keep It Clean


Part 5 - Searching


Link to YouTube playlist

Thursday, October 23, 2014

How to Create and Edit Extra Pages in Your Blog (Part 6 of 6)

This is Part 6 of a series of posts on using a blog for your class website.

Click "Pages" in the left-hand list menu. You'll get a screen that looks very much like your list of posts, but empty.

You create, edit, and publish new pages just like you create, edit, and publish new posts. The difference is that these pages do NOT appear on your home page in your stream of posts. The extra pages you are creating are static pages, meaning that they are not updated when you add new posts to your home page. For that reason, they're good for keeping information about the class, or about you, or about some special long-term project the students are working on.


Once you've created a few pages, you need to put a gadget on your home page so students and parents can get to them. Click on "Layout" in the left-hand list menu. Click on any spot that says "Add a Gadget", then click on "Pages" in the box that opens. This will open your options box for the Pages gadget:
Under "Pages to show", check the pages that you want to include in the gadget. (This is also where you can add a link to an external website, like the school or district website, or Aeries.) Under "List Order", drag the pages to the order in which you would like them to be shown.

This box will appear like this no matter where you have added your gadget. However, whether the pages show up horizontally (like tabs) or vertically (like a list of links) depends on where the gadget is added. If you want to have horizontal tabs, move the gadget to be underneath the blog header. If you put the gadget in the sidebar, it will appear as a list of links. You can move the gadget around after you click "Save", in the layout screen.

For this example, I've added my Pages gadget underneath the header, so it will appear as a horizontal series of tabs, like this:

How to Customize the Look of Your Blog (Part 5 of 6)

This is Part 5 of a series of posts on using a blog for your class website.

Click “Template” in the left-hand menu. Here is where you can choose the look for your blog. I recommend keeping things simple rather than ornate; it’s easier for more students and parents to read that way.
To make things even easier, especially for younger students, you probably want to make the font larger and darker than the default. To do that, click on “Customize”.


Then click on “Advanced” at the upper left of the screen.


Here you have control of the font size and color for “Page Text” (as well as everything else). Be restrained with this. It’s much easier to make your page harder to read than it is to make it easier to read.

How to Add Items to Your Blog's Sidebar (Part 4 of 6)

This is Part 4 of a series of posts on using a blog for your class website.


Click “Layout” in the left-hand menu. Here you see the different elements of your blog. You can edit things here as you like, or you can leave them as-is.
In the circled region on the right are the “gadgets” in your sidebar. This is where you can add boxes that make your blog more appealing and useful. Here are some of the better ones and what they do:
  • Follow By Email – allows a reader to enter their email address and then receive an email whenever you update your blog 
  • Pages – if you create additional pages for your blog, you can list them here so readers can find them 
  • Search Box – allow readers to search for terms or keywords in any of your posts 
  • Text – you can add a static text message; this might be good for your contact information or your availability for after-school help 
  • Image – add a picture 
  • Slideshow – add a slideshow that includes multiple pictures 
  • Poll – survey readers 
  • Blog List – include a list of other blogs you like, maybe other teachers’ classroom blogs 
  • Link List – include a list of websites; perhaps useful resources for your class 
  • List – include a list of items; anything you like 
  • Labels – if you label individual posts, this gadget displays the labels you’ve used and lets readers filter posts and search for a label 
  • Profile – information about you, including contact information (New blogs have this automatically added.)
  • Blog Archive – this lets readers go back and find blog posts from previous months or years (New blogs have this automatically added.)
You can change titles or options for any of your gadgets by clicking on the word "Edit" in the lower-right corner of the gadget in the layout above. From your "public" blog screen, if you are signed in, you'll see a small "tool" icon on each gadget, which will also let you edit the gadget. To remove a gadget entirely, click on the word "Edit", then click "Remove" in the options box that opens up.


How to Post on Your Class Blog (Part 3 of 6)

This is Part 3 of a series of posts on using a blog for your class website.

There are multiple ways to create a new blog post. Blogger makes it easy and gives you many buttons to use. Anything that looks like a pencil or says "New Post" will bring up the editing page.


The editing page looks a lot like Google Docs or Word or any other writing tool. There are a few options along the right side:
  • Labels allows you to tag posts with a keyword, or category, to make it easier for readers to find them. You can include as many keywords as you like.
  • Schedule allows you to set a post to be published automatically at some future time.
  • Permalink lets you customize the URL for this particular post; this is not very useful.
  • Location adds a marker to the post indicating from where it was posted. This might be useful if you are posting from vacation or a field trip; otherwise, probably not.
  • Options lets you enable or disable comments specifically for this post, overriding your settings for the entire blog.

As you are writing your post, Blogger will save the post automatically, just like Google Docs does. If you want to make extra sure that your post is saved, you can use the Save button in the upper right. If you want to see what your post will look like on your blog, click the Preview button. You can use the Close button to get back to your blog dashboard. But the important button here is Publish. Once you have written your post and previewed it, you need to click Publish to make it public.


In this picture, you can see that I've written two posts. The top one, however, has not been published, so it is still marked as "Draft". You can remove a post that has been published by using the "Revert to draft" button. You can also edit a published post by clicking on the title of the post in this list. You have several options to make edits, corrections, or additions, even if you have published a post.

How Often Should I Post?
Many teachers like to post weekly. Personally, I would post daily. At the end of each day, I wrote up what we did for that day while it was fresh in my mind. How often you post is up to you. Just make sure you can keep up with the schedule you decide, so students and parents know what to expect.

How to Set Up a Blog for Your Class Website (Part 2 of 6)

This is Part 2 of a series of posts on using a blog for your class website.


To set up a new blog, go to www.blogger.com and use your district username and password to log in. You'll see a screen like this. Click "New Blog" to set up your classroom blog for the first time.

1. Pick a name for your blog. This will show up at the top of every page.
2. Pick an address. Since this has to be unique, it’s probably a good idea to include your name in it somehow. Try to keep the address short and easy to remember.
3. Pick a design for your blog. (I recommend staying away from the Dynamic Views. Anything else is fine.)
4. You’ll be able to change all of these options later, if you change your mind. Click “Create Blog!”

Once your blog is ready, you’ll see it listed on your Blogger home page. The options in the menu here are the same options you’ll see on the next page. Click on “Overview” or click on your blog’s title to go to the Overview page.

This is the “behind-the-scenes” look at your blog. You see your main menu options down the left-hand side of the screen. You also see two (2!) buttons that will create a new post for you.
Click on “Settings” at the bottom of the menu options.


The Basic Settings page lets you change the title, description, or address of your blog. You can also add additional authors to your blog here, if you want someone else to post.
The two circled options (Privacy and Blog Readers) let you set some limits on who can see or read your blog.


The Privacy settings determine whether or not Blogger or search engines can find your blog. These settings do not have any effect on who can read your blog (assuming they can find it).
The Blog Readers setting determines who gets to read your blog, no matter how they found it.

Click on “Posts and Comments” underneath “Settings”. This lets you decide who can comment on your blog posts. If you are using this blog only for your classroom calendar, you probably don’t want students or parents to leave comments. To turn comments off, you would click “Only members of this blog”. That way you are the only one who can comment.
If you do allow comments, you may want to enable comment moderation. If you turn on moderation, that means that readers can leave comments, but they will not be posted until you approve them. It’s an extra step for you, but it might be worth it.


Why You Should Use Blogger for Your Class Website (Part 1 of 6)

If you want a class website that is easy for students to find what they need; easy for you to post information, files and links; easy for parents to keep up to date on what is going on in your class; and flexible enough for you to tailor it for your own tastes, you want to use Blogger.

I've become convinced of this after helping teachers create class websites in Google Sites, watching teachers deal with the difficulties, confusion, and limitations. Other teachers have chosen to use Edmodo or Weebly instead; still others continue to use HTML editors and build sites hosted on our own district server. What pushed me to Blogger was a session at the GAFE Summit in Coronado earlier this month, presented by Jen Roberts (@JenRoberts1) of Point Loma High School. Jen made a great case for teachers using Blogger as a class website, and convinced me whole-heartedly. Since then, I've tried out Blogger on a couple of teachers, and they've been very positive about it. I think it's easier to use and set up than Google Sites, and allows you to give a better view of your class to students and parents. (Here's a link to Jen's 9th-grade English class blog, as an example.)

Blogger is part of the Google Apps suite, so you already have an account through your district login. As with Sites, you can create as many blogs as you like, so you can have separate blogs for different classes, as well as a personal blog for reflection, if you choose. You can post daily or weekly updates for your class, as you choose. Each post can include photos or videos, formatted text, links to class files, or links to outside resources. You can add separate pages for particular projects, topics, or resources. You can have a sidebar with gadgets like a search bar so students can search your site, or an email subscription tool so students or parents can get your latest post sent to them automatically (look to the right of this post). You can schedule posts to appear at a future time, like at the beginning of your class the next morning. You can enable or disable comments for your entire blog or for individual posts. Blogger can do so much that Google Sites cannot. You should be using Blogger for your class website.

If you're not yet convinced, here are the resources from Jen's presentation; she makes the case better than I can. If you're ready to get started, the next several posts in this series will show you how to create a blog, how to post on it, how to create extra pages, how to format and customize your blog, and how to add widgets to the sidebar. Let's start blogging!


Tuesday, October 21, 2014

Reflections from EdCamp San Diego 2014

These are my random reflections from EdCamp San Diego 2014. They're very much from my own perspective as an organizer, not as an attendee. I'm hoping they will be useful to organizers of other EdCamps.
  • They started coming about 7:45. Up until that time, I still had the "pre-party jitters": What if nobody comes? By 7:50, I didn't have to worry about that any more; instead I had to go find more people to work the registration desk.
  • This was our second EdCamp and easier by FAR to put together than the first one. We probably did about a quarter of the work this year as compared to the previous year. Which makes sense, since we were really feeling our way along last year, with no one in the group who had put on an EdCamp before. By this year, we were seasoned veterans. We had set up a Google+ community to organize our resources and discussions. We had a total of two Hangouts to discuss planning; most of the discussion happened in the G+ community.
  • We also had control of our own website this year, which saved some work. Jo-Ann had experience with Eventbrite, as well, making that part easier. And we were more confident about attendance (or lack thereof) than we were last year. In 2013, we were very conservative about the signup page, because we did not want to exceed the capacity of our venue. This year, we knew that we wouldn't get more than 50% attendance (if even that), so we just put out 300 invites at the beginning and didn't worry about it. All 300 were taken by a few days before the event; we ended up with about 130 people actually attending.
  • I would very much like to know how many people who attended this year had also been there last year. I think we should include that in our pre-survey in the future.
  • Our session board went well. I liked having two colors of cards, one for "What I want to learn" and one for "What I want to lead". How I think we handle it next year is to NOT put the "learn" cards on the session board, but instead put them off to the side. The idea would be that people could read the "learn" cards, pick what they might be able to "lead", and then put that on the board. By putting the "learn" cards on the board directly, it was a little confusing, and I think may have discouraged some people from putting their own sessions up, as the board appeared to fill up.
  • I didn't get to see the introductory session, but I heard that Jo-Ann and Jeff did a great job. This is the second year I've missed the intro session, because I've been entering session descriptions into the website and mobile app so they're ready for session 1. I'd love to think of a better way to do that, but haven't been able to come up with one yet.
  • During session 1, I finished entering session descriptions into the mobile app while Leigh Murrell helped me out by doing the web side of the task. Then I dropped in to a few sessions and took some pictures. Everything seemed to be going well, and I noticed what seemed like a better balance in session turnout than last year. In 2013, it seemed like there were some sessions that were packed, and others with only 2 or 3 people in them. I didn't see anything like that this year; most sessions (that I saw) were well attended but not overcrowded.
  • In session 2, I spent most of my time in the ToSAs brainstorming session. I went to that room only intending to stay for a few minutes, but got drawn in to the discussion and didn't leave until I had to go check on the lunch trucks. It was really interesting to hear different districts' models for ToSAs, and the various responsibilities. I offered an invite for our ToSAs Unite Google+ community before I had to leave.
  • Lunch trucks should have been a great idea. Apparently, it was more difficult than it needed to be. Joe Hartmann was our lunch truck wrangler, and he's already called "not it!" for next year. We were concerned about timing: could everyone get their food in the hour that we had set aside for lunch? To help with that, we tried to take "pre-orders": when you check in, look at the menu and write down what you want on an index card. According to the lunch truck workers, that didn't really help at all. In any case, there did not seem to be any problem with timing. We had 3 trucks to feed 130 attendees, some of whom either brought their own lunch or had already left, so let's say around 100 people purchasing from trucks. I get the sense that we're kind of on the low end of the numbers these trucks want in order to make it worth their time to show up. Maybe next year we only get two trucks? Or maybe we go back to the "donated pizza" model. We'll have to see.
  • In session 3, Krystle Miller and I led a session on professional development. It turned out to be more popular than I thought it would be (probably 25 people or so), and an easier topic to discuss than I was afraid of. Krystle had said that the ideal EdCamp session leader introduces the topic and then doesn't talk at all for the rest of the session. That's exactly what happened in our session, so I think we have to count it as a success!
  • For the last session, I was in the Board Room helping Jo-Ann and Krystle get ready for the prize giveaways. Jo-Ann had suggested (based on seeing it at a different EdCamp) that we do the raffle tickets differently than we had in the past. Instead of one big bin that everyone puts their ticket in, getting selected for a random prize, we had individual containers labeled for each prize. Attendees got to pick which prize they wanted and put their ticket in that bin. That way, no one would get a prize they really didn't want. It seemed to work very well, and quickly, which is important for the closing session at an EdCamp.
I absolutely loved getting to see my friends and colleagues from other districts, as well as getting to meet many of them face-to-face for the first time. Every time I go to an EdCamp, whether or not I'm one of the organizers, I meet more great educators, get more great ideas, and become a better professional. Thanks to everyone for helping to make EdCamp San Diego 2014 a success!

UPDATE Oct 24: Apparently, our attendance was closer to 150 than 130. Great to hear!

Sunday, October 19, 2014

Fifteen Things You Should Know But Maybe You Don't

  1. Students do not have email accounts through their district accounts. Their login name (like "smithj1234@my.sduhsd.net") looks like an email address, but we do not have email enabled for students. (This may change in the near future; watch my weekly emails for information if it does.)
  2. Blogger and YouTube are owned by Google, and therefore are part of our Google Apps. Your district email account lets you sign in to Blogger and YouTube as well.
  3. Nothing will import grades into Aeries. When you find yourself asking "I wonder if this program can import grades into Aeries..." just stop. The answer is no. Sorry.
  4. You should be using the "SDUHSD" wireless access. If you're using "guest_SDUHSD" or "School", switch over. You'll be glad you did.
  5. Every Emily Dickinson poem can be sung to the tune of "Yellow Rose of Texas."
  6. You can access files in your H: drive remotely by going to files.sduhsd.net. If you're on your own computer, try "Advanced Mode" first. If that doesn't work, or if you're on a shared computer, use "Basic Mode".
  7. You can save any type of file in Google Drive, not just documents, spreadsheets, or presentations. Just "Upload" a file (or click "New" if you're in the new Google Drive).
  8. Wait, there's a "new" Google Drive? Yep. Click on the "gearbox" in the upper right of the screen. You should see a menu choice that says something like "Try the New Drive". Soon it won't be a choice, so the sooner you get used to it, the better.
  9. You can drag files from your computer to Google Drive instead of clicking "Upload". You can also drag and drop files to different folders within Google Drive.
  10. Student Google accounts are wiped out every summer, so if there's something students want to save, they need to move it to a personal account. (This is another thing that may change in the near future because of changes to the way Google handles accounts.)
  11. iPads are not the only tablets that exist. Look into Android tablets, and you just might find something you like, for much less.
  12. You can use the Windows Logo key on your keyboard for shortcuts:
    • Windows Logo + P : switch projector display
    • Windows Logo + right arrow : move the open window to the right half of the screen
    • Windows Logo + left arrow : move the open window to the left half of the screen
    • Windows Logo + L : locks your computer and requires your password to open it again; useful if you're using your computer in a classroom of students
  13. In Chrome, you can use an "Incognito" window to let someone else log in to their email or Google Drive temporarily. From the Chrome menu (the three stacked bars in the upper right), select "New Incognito Window". Then the second person can log in without you having to log out. This can be useful if a student wants to load a class presentation from their Drive on your computer, or if you're working with a colleague who needs to use your computer for a few minutes.
  14. If you type "1-minute timer" into a Google Search box, guess what you'll get. Try it out.
  15. Google Docs has a "Research" option from the "Tools" menu. If you highlight a word or phrase, then select "Research", a side panel will open up with a search for that term. You can then insert links and citations directly into your document from the panel.

Saturday, October 4, 2014

In Its Most Basic Form, Everything is Simple

In an otherwise unobjectionable column about the difficulties facing the current and any future superintendent of Los Angeles Unified School District, columnist Steve Lopez opens with perhaps the most ridiculous statement about education that I have ever read.
In its most basic form, the idea is pretty simple. The bell rings, students file into class, and teachers share knowledge and tap into natural curiosity.
Well, sure, if you want to be ultra-reductionist about it, everything is simple. Let's try some others:
In its most basic form, the idea is pretty simple. The patient is wheeled into the room, you cut into the chest, fix the heart, and close it up.
In its most basic form, the idea is pretty simple. The judge enters the courtroom, you tell the jury why the defendant is guilty, then everyone goes home.
In its most basic form, the idea is pretty simple. The astronauts enter the rocket, someone pushes "Fire", and the rocket lands on the moon.
In its most basic form, the idea is pretty simple. You sit down at a computer, write an intelligent column, and give it to your editor.
Hey, this is easier than I thought! I don't know why I've ever worried about anything!


Friday, September 19, 2014

To "E" or Not To "E" - Teens and Reading

Adrienne St. George is our district's Media Center Specialist. She contributes this guest post on teens and reading, although she would like to state for the record that she had nothing to do with the terrible headline of this post. You can contact her at adrienne.stgeorge@sduhsd.net.


Teens are reading more than ever!!! No, that is not a line from a science fiction story; that is a very current consensus by reputable research groups and interested critics.

Teens' reading efforts match/exceed adult levels:
16 – 29 age groups actually read MORE than the 30+ age group. A lot of this is due to reading that is necessary for school but personal reading numbers are equal for both age groups which is awesome news! Teens/young adults will read on any device available while the 30+ age group prefers an e-reader or print.

Teens/adults use libraries differently than adults. Statistics show that they actually use libraries MORE than adults. However, they use them for book recommendations, getting help with apps and digital questions, e-books, online information, and online classes. The general consensus of teens/young adults is that all library services should be online. When asked about the future of public libraries, teens and young adults don’t think that libraries, as a physical entity, will have a strong impact on their community. They DO, however, want to be able to access all of the public library digital resources.

When asked about a preference in reading print or a digital format, youngsters (0 -8) tend to lean to print, as that is what they are familiar with when parents read to them. Parents are in full support of print for the 0 – 8 age groups for reading because that is what they grew up with and are familiar with. From age 10 on, most parents are not as concerned with the version of a book; they just want their kids to read! Some of the reasons given by parents for the huge rise in digital reading in teens since 2011:
  • I read e-books and that’s what my kids see. If I am modeling this behavior, I need to allow them the same option.
  • E-books are available right away. Being able to satisfy an interest in a book right away is important.
  • There is a wide selection of e-books.
  • E-readers are affordable, some are even free.
  • E-books are easy for long travel, on the way to school or in bed.
  • If an e-book will get my kids to read, then they can read an e-book!
The bottom line is that reading, as a whole, is on the rise. Statistics show that e-books have been instrumental in saving the publishing industry... just like Burton pretty much saved the skiing industry with the very “nasty” snowboard! (Sorry I can’t back that up officially but who cares as long as there is a mountain covered with sierra cement to ride?!)  Many say that e-books have contributed to the resurrection of reading, but who cares as long as everyone is enjoying a book in whatever format they prefer?


Book Revenues are Up, by Kelsey McKinney on June 27, 2014, Vox Media
Children, Teens and Reading, Common Sense Media Research Brief, 2014
E-books vs Print: What Parents Need to Know, by Jenny Deam, Parent and Child/Scholastic, 2014
E-book Revolution: We’re Reading More than Ever!, by Husna Haq, Christian Science Monitor, April, 2012
Zero to Eight, Children’s Media Use in America 2013, Common Sense Media Research

Pew Reports:
A Snapshot of Reading in America in 2013
Digital Age Reading, Writing, Research
E-reading Rises in 2014
The Rise of E-reading

Teens, Tech, and Trends

Adrienne St. George is our district's Media Center Specialist. She contributes this guest post on teens and technology. You can contact her at adrienne.stgeorge@sduhsd.net.


Technology is NOT going away! That’s not a news flash, is it? The real news is that as the use and acceptance of technology expands, so do the skills of the users, especially those in the 16 – 29 age groups.

Recent reports from PEW, Common Sense Media, and other research centers, show that the use of technology as a whole is increasing dramatically from ages 0 – 60+ with very encouraging trends. The surges of use and skill vary for different age groups and for different end goals.

With the focus on teens and young adults, the research results are amazing. Referred to as millennials, access to media devices for this group has exploded in the past 2 - 3 years. Usage of media devices has more than doubled in that time. Average time of use on a device has tripled in that same time frame. Traditional screen media such as TV, DVD, video games has decreased significantly. TV is still a dominant venue but is now viewed through a DVR, is streamed or viewed from “on demand”. Access to devices is becoming more equitable to all socioeconomic groups. Smartphones are the devices that are used the most.

Why a mobile device? Why a smart phone? Reasons given to researchers:
  • Always with us 
  • Instant information and accessibility anytime/anywhere 
  • Fingertip action 
  • Timely info 
  • Location sensitive 
  • Instant feedback 
  • Ability to create our own info and share 
Summary of research:

Teens live in a different information ecosystem:
“There is no playbook for this new environment” (13 Things to know about Teens and Technology, Pew Project, July 23, 2014.) Teens are not aliens but they are different because they are tied to technology. Technology saturates their lives. Teens are becoming a network of information. Information is another skin…natural, ubiquitous, portable, immediate, timeless, participatory, connected and social. More than 95% of all surveyed have broadband at home, more than 70% have access to the Internet on a mobile device, 78% at least have a cell phone (close to 50% have smartphones), 81% use social networking. End result: data and info is a third skin…it is just normal.

Teens live in a different learning ecosystem:
The surveyed College Board and NWP teachers agreed that although technologies are creating a somewhat distracted generation, the internet and digital tools have had a very positive impact on student research. These same teachers strongly believe that the Internet gives students a much wider range of resources than traditional resources. Students know how to access the Internet, use search engines and find information easily. They all agree that while students are very self-sufficient researchers, they believe that a lot of the information found is overwhelming and difficult for students to understand. However, they believe that this is a common problem with traditional research as well. Their main concern for students is the inability to discern bias and validity. Traditional resources were usually considered “pre-validated”. Now students must learn how to validate sources themselves. This is where teachers come in. The surveyed teachers strongly believe that digital literacy needs to be incorporated in daily lesson plans. These teachers stated that exposing students to and teaching them how to use digital resources other than the top three used (Google, Wikipedia and YouTube) would expand research skills, learning and knowledge to even higher levels.

Learning should be a process, rather than an assignment. Teens/young adults create knowledge, rather than receive knowledge. Knowledge is interactive, rather than transmitted in static structures. Learning is active with the learner managing his/her own learning process, rather than passive with the learner just listening and watching.

Overall consensus:
Teens/young adults are wired differently and lead very functional hyper-connected lives. Teens are able to handle multitasking seamlessly. Adults claim multitasking skills, yet they are aware of the different tasks they try to accomplish simultaneously, while it is effortlessly integrated in millennials. Multitasking for adults is clunky and obvious; multitasking for the under 30 age group, is fluid and natural.

The majority of survey participants strongly predict that the future, as soon as 2020, is positive for millennials. Millennials will be able to problem solve quickly and efficiently through cooperative work; they will be able to effectively search for information online, discern the quality and veracity, then communicate the findings; they will be able to synthesize and collect details from many sources into a final suggestion/solution; they will have the ability to distinguish between “noise” and the real information in forever growing amounts of data.

I've always been fascinated by what teens/young adults are capable of doing with phones, with tablets, with all of their devices for school and for fun. Teens today are bright and savvy; they want to be challenged. They want to try to do everything on their devices especially if people tell them it is not possible. It is so nice to hear clear optimism from so many reliable sources that teens really are capable of using technology successfully for learning and probably in ways adults never imagined.


More Teens Use Smart Phones to get Online, eSchool News, 3, 2013
Zero to Eight, Children’s Media Use in America 2013, Common Sense Media Research

Pew Reports:
5 Media Spaces Where People Live
Digital Age Reading, Writing, Research
Teens and Libraries in Today’s Digital World
13 Things to Know about Teens and Technology
Teens and Technology 2013


Monday, September 8, 2014

Ditch the Presentation Myths

Cross-posted at http://www.graphite.org/blog/ditch-the-presentation-myths

We’ve all been there. Assigning the students a project and class presentation seemed like a good idea at the time. Now you’re a third of the way through listening to the students, and you’ve seen enough bad Powerpoint and heard enough monotone reading of notes to last a lifetime. “Never again,” you say to yourself. “Next year, I’m assigning something different.”

I’ve found that many teachers still hold ideas about student presentations that are not true. Here are some myths for you to bust when thinking about your next “presentation” assignment:

1. Presentations take students a long time.


This may have been true in the days of 3-fold poster board and glue sticks. Today, however, even if you give students 3 weeks to create a presentation, they are likely to do it the night before it is due. Most students with access to computers or tablets can create presentations in about an hour. Such is the power of Google Slides, Prezi, or Haiku Deck.

I recently ran a workshop for principals and assistant principals in our district. As part of that, I asked them to research models of student-centered classrooms and create a presentation for their colleagues. They had 45 minutes in which to do this, and I asked them to use a presentation tool they were unfamiliar with. Every team was able to produce something. If non-tech-savvy-administrators can deliver in 45 minutes, surely our students can do likewise.

Now, obviously, you probably don’t want to have every presentation be a quick-and-dirty assignment like that. But don’t think that assigning a presentation necessarily has to be a long-term project for students.

2. Students have to stand and deliver their presentations.


“Well, OK, maybe students don’t need that long to create their presentations. But it still takes a huge amount of class time for each group to get up and deliver their presentation, right? I mean, even a 5-minute presentation, times 10 groups in a class, that’s nearly an hour of class, right?”

It doesn’t have to be. Sure, there will be times when you want students to present orally in front of groups of people. But that doesn’t mean it’s a requirement any time students create a presentation. Students could use tools like Explain Everything, Screencast-o-matic, or Educreations to make a short video. They can then share that video with you, or with the rest of the class. Homework that night could be to watch three other groups’ videos and write responses.

One of the ways I have had teachers collect links to student productions is through Google Forms. A simple form could include just two questions: “What is your name?” and “What is the link to your presentation?” The teacher then gets a spreadsheet with links to all the presentations and can do with that what they want.

3. Presentations have to be linear.


As we ask teachers to move away from the “stand-and-deliver” model of classroom teaching, we should be asking students to move away from that model as well. Part of that instructional shift means allowing the viewer of the presentation to choose how they move through the material. Tools like Thinglink, Padlet, Tackk, and GlogsterEDU allow for a non-linear delivery of information, at the discretion and control of the viewer.

Creating a linear presentation is simple: first this, then this, then that. Creating a presentation that makes sense no matter which order the viewer chooses is much harder, and will require some coaching from the teacher to make sure the student groups can accomplish this. Still, it is a valuable strategy for students (and teachers) to learn.

Monday, September 1, 2014

Of Poor Cartooning, Obvious Jokes, and Back-to-School Assignments

Joe Heller, Green Bay Press-Gazette, 2009
Jeff Parker, Fort Myers News-Press, 2012
Rick McKee, The Augusta Chronicle, 2014
And these are just the ones I found with a few minutes of googling. OK, we know that there are only a few editorial cartoons in existence, that get rehashed over and over. (Surely there's an "Editorial Cartoon Tropes" website, like "TV Tropes", but I'm not going to search for it because I might find it.) And, yes, I get that single-panel cartoons have to include signifiers like the apple on the desk, old-school (literally) chalkboard, and ruler in the school-marmish teacher's hand, so that (older?) readers know the scene is set in a classroom. And I understand that part of the "humor" in these is the contrast between the "old" teachers and the "young" students these days with their phones and their technology and their twittagramsnapbookchatspaces and whatnot. But really? Do we have to do this same "joke" over and over again? (With a little bit more searching, I bet you could find the same cartoon for 2010, and 2011, and 2013. I'll actually give Joe Heller a little credit: in 2009, Twitter was not nearly the big deal and obvious cultural reference it became later.)

You know what would be a great assignment for the first week of school? Having students share what they posted on Twitter during the summer. Or on Instagram. Or have them create a Glogster of their photos and texts and tweets. Or contribute to a class blog about their experiences. Or compiling their Vines into an annotated YouTube video.

You know what would not be a great assignment for the first week of school, and would only indicate that you are out of touch with modern schools, children, technology, and culture in general, and that you can only imagine a school system that looks exactly like it did when you went to school decades ago? Asking students to put down their devices, ignore the writing and reflection they did during summer when school is out, have them get out a nice, sharp #2 pencil, and handwrite (maybe in cursive) a boilerplate 3-paragraph essay about "What I Did This Summer".

"But," you might object, "kids didn't do real writing during the summer. Texting and tweeting and tumblring aren't valuable as academic writing." Maybe not. But they were doing it. They were communicating with each other. Writing practice is writing practice. The inestimable Randall Munroe of XKCD, as usual, has said it better than most:


Wednesday, August 13, 2014

It's Going to be a Busy Fall

Here are some of the professional engagements I have between now and the end of the year:
  • October 4 & 5 - GAFE Summit Coronado
    • I have applied to present about Add-ons for Google Docs and Sheets, specifically Flubaroo, Doctopus, and g(Math). I expect to hear whether or not I have been accepted in early September. Either way, I hope to get a team from our district to attend.
  • October 18 - EdCamp San Diego
    • I'm one of the organizers for this event. Last year was our first, so since we (presumably) know what we're doing this year, I think the planning will not be nearly as arduous as it was last year.
  • October 24 & 25 - Fall CUE, American Canyon HS
    • I will be presenting about Blackboard Summer Academy, but broadening it to the use of any LMS, so I've re-titled my talk "[Insert LMS Here] Summer Academy". It will be very similar to the talk I gave at the Blackboard workshop in Chula Vista last year.
  • November 15 - SDCUE Tech Fair, La Costa Canyon HS
    • I will be presenting (again, hopefully) about Add-ons for Google Docs and Sheets. And, since it was my suggestion to bring the SDCUE Tech Fair to LCC in the first place, I will also be working closely with SDCUE as a liaison for the district.
  • December 12 & 13 - eSS Symposium, San Mateo
    • Here I will be reprising my [Insert LMS Here] Summer Academy talk.
Whew!

Saturday, August 9, 2014

What I Did on My Summer Vacation

End of June - ISTE Annual Conference - Atlanta, Georgia
My first trip of the summer started about a week after I had finished the school year. For the third year in a row, I was able to attend the huge annual conference put on by the International Society for Technology in Education (ISTE). In 2012, the conference was in San Diego; in 2013, I traveled to San Antonio. This year I flew to Atlanta for this enormous ed-tech affair.

The size of this conference is both a blessing and a curse. Because of the number of attendees, ISTE can attract some of the best keynote speakers, the best presenters, and a vast array of vendors for the exhibit hall. On the other hand, nearly every major session is crowded, overflowing, or with a huge line to get in. I had more than one instance in which I went to attend a session, saw the line of people waiting to get in, and just turned around and walked away. The crowds got frustrating after a while.

The best formal session I attended was a talk by Dr. Ruben Puentadura, creator of the SAMR model for instructional technology integration. He gave a great description of the connections between the TPACK model and his SAMR model, showing the overlap and similarities. It really helped me with a better understand of TPACK. (I've written before about my preference for SAMR over TPACK when working with teachers.)

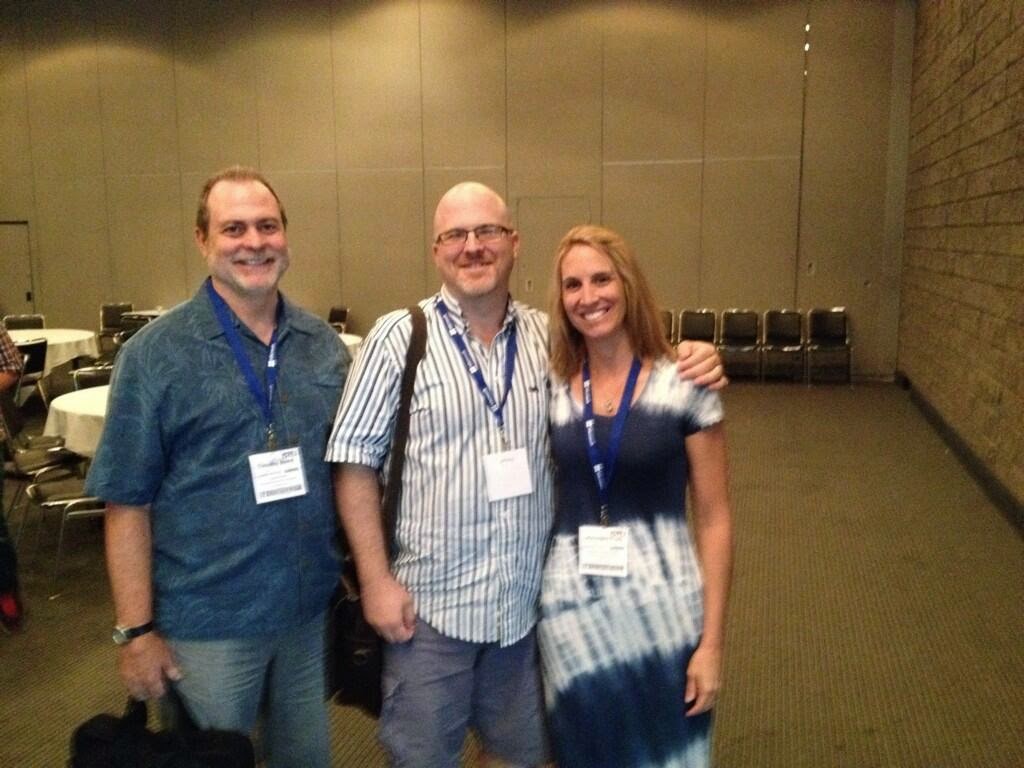
With Tim Baird and Leighangela Brady of Encinitas USD
The exhibit hall for ISTE is always massive; too much to take in for any one person. At other conferences, I set aside time to just wander up and down the aisles, seeing what companies are there and what they might be able to offer us. There is no way you could accomplish this at ISTE. What I did instead was go through the program and pick out eight or ten vendors I wanted to talk to, then targeted those booths. Even so, that ended up taking me the better part of an afternoon, and I was exhausted from walking back and forth across the cavernous exhibit hall.

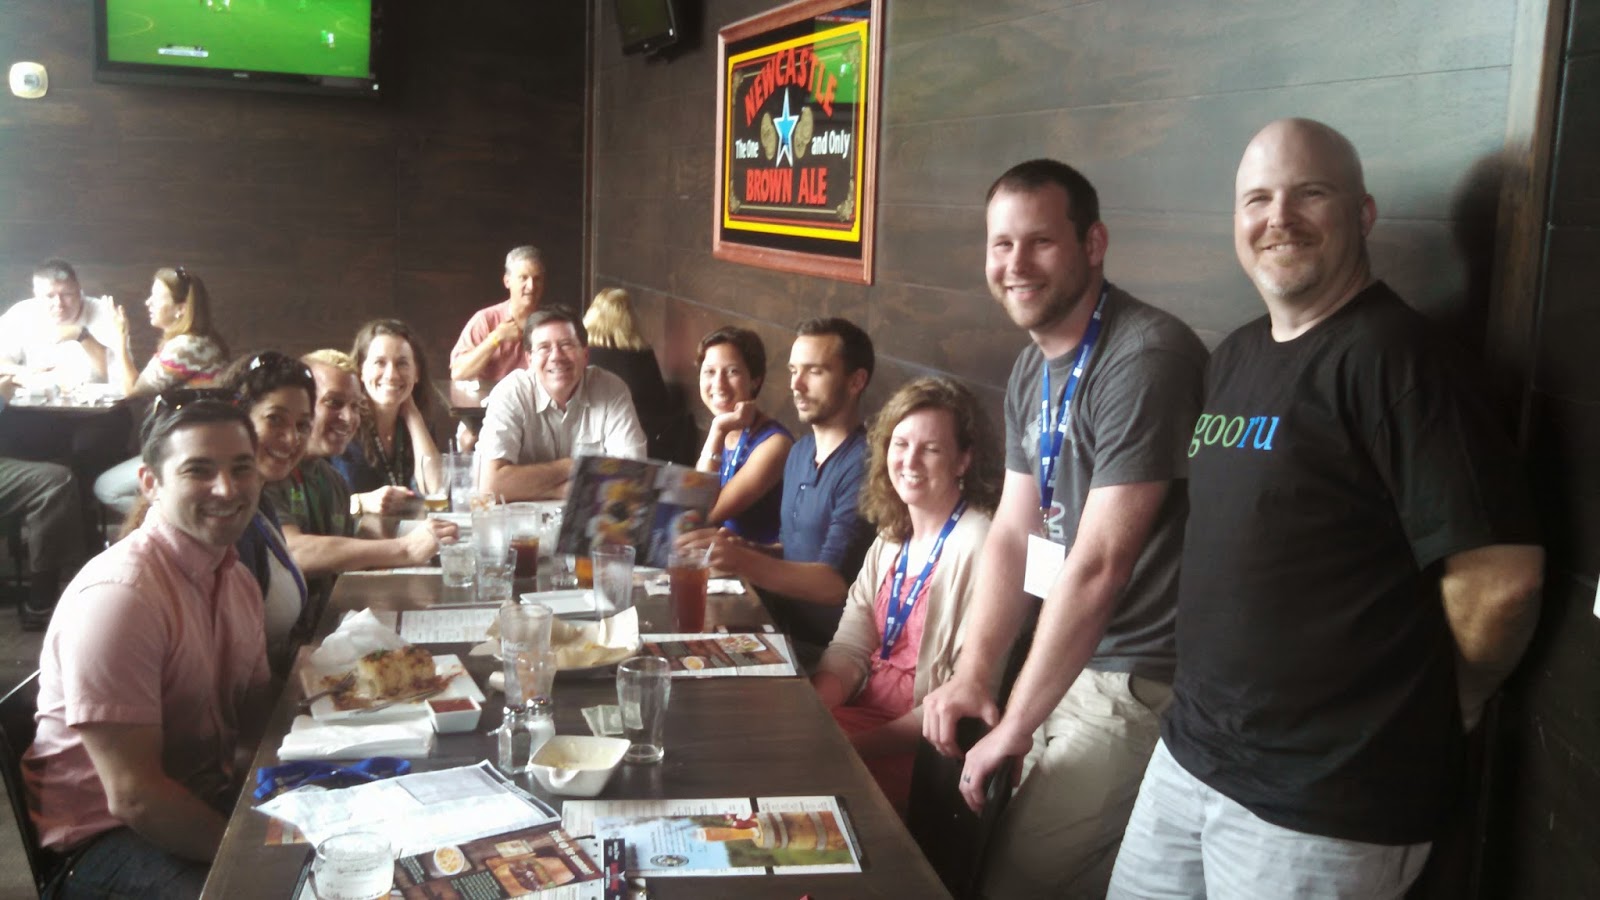
Despite the size of the crowd, I did manage to meet up with people I knew, thanks to social media. The night I got in to Atlanta, I met up with a group of teachers, many from California, at a German-style beer garden for a "#brewCUE". I arranged to meet up with Dr. Brady and Tim Baird from Encinitas; we talked after a session on effective PD for teachers. Mike Guerena from Encinitas was on my flight from San Diego; I only found out after tweeting about the flight delays. I had lunch with Torrey Trust, my former student at La Costa Canyon and newly minted Ph.D. from UC Santa Barbara. Her talk on how teachers used social media was enlightening and exactly in line with other research presented at the conference.

Future Google Certified Teachers meeting for the first time

I also met up with a few of the teachers who would be attending Google Teacher Academy with me at the end of July (see below).

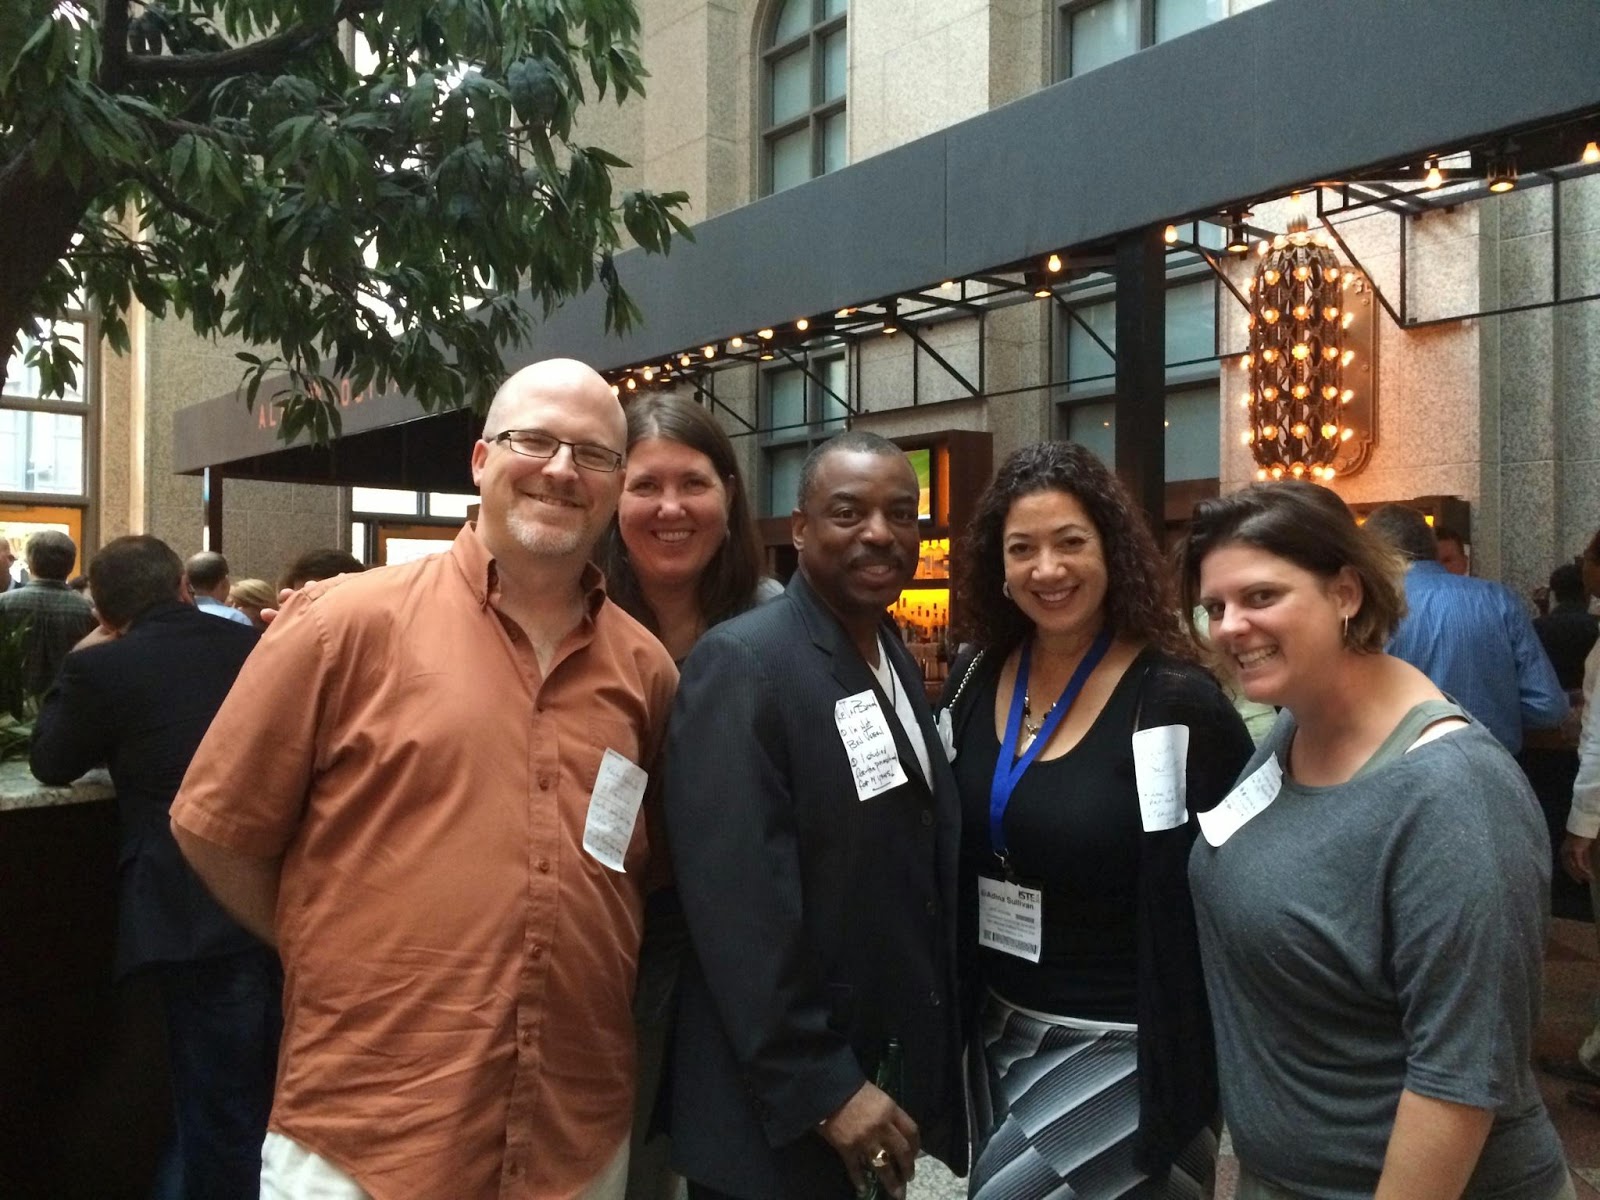
Oh right, I also got to meet Levar Burton, fresh off his
Reading Rainbow App kickstarter success.


Perhaps the most affecting part of the trip was my visit to the National Center for Civil and Human Rights. I had a free afternoon, so I visited this museum, most of which is dedicated to the Civil Rights movement in the early 1960's in the South, especially Atlanta. I found it an extremely emotional experience. I am a history buff and have a good understanding of the events of the 60's, but going through the well-designed exhibits brought home the personal costs to people of that era. I found myself furious that these things had happened in my country, and wondering to myself, "If I am so emotionally affected by this, what can it possibly be like for the black parents and children who are walking through here with me?" If you're ever in Atlanta, this museum is a must-see.
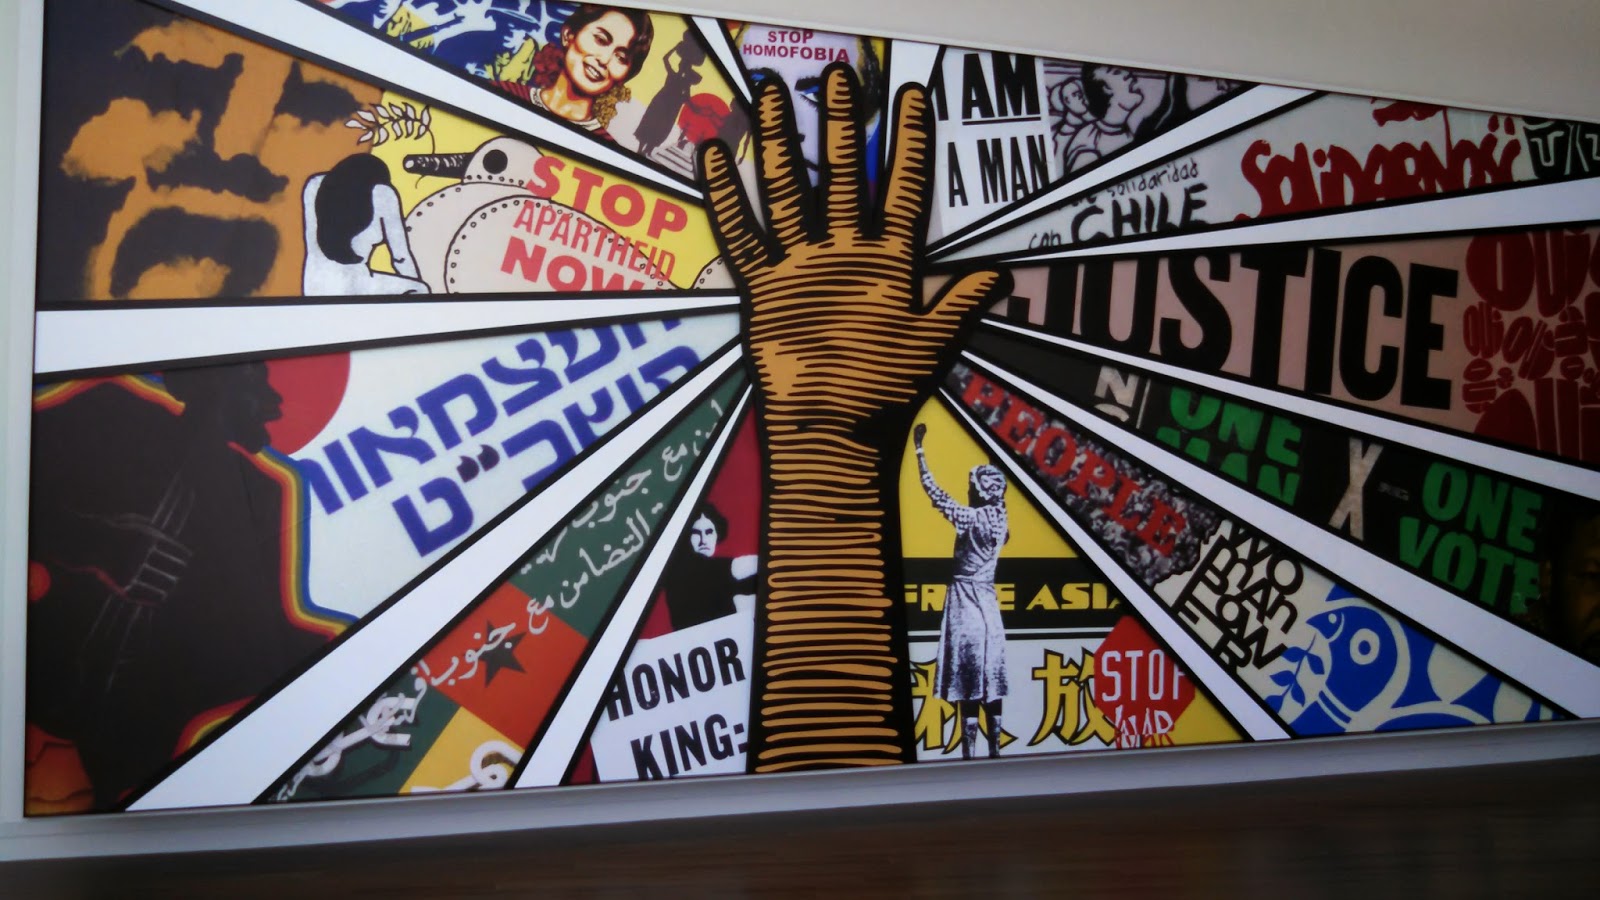
Mural at the National Center for Civil and Human Rights.
Mid-July - Vacation - Amsterdam, Netherlands
A long time ago, when I was a relatively new teacher, a veteran gave me some great advice. He said it was every teacher's responsibility to do something different during the summer, to become a more well-rounded person and therefore a better teacher. Professional growth is important, summer jobs are important, but a one-dimensional teacher is not doing his or her students any good.

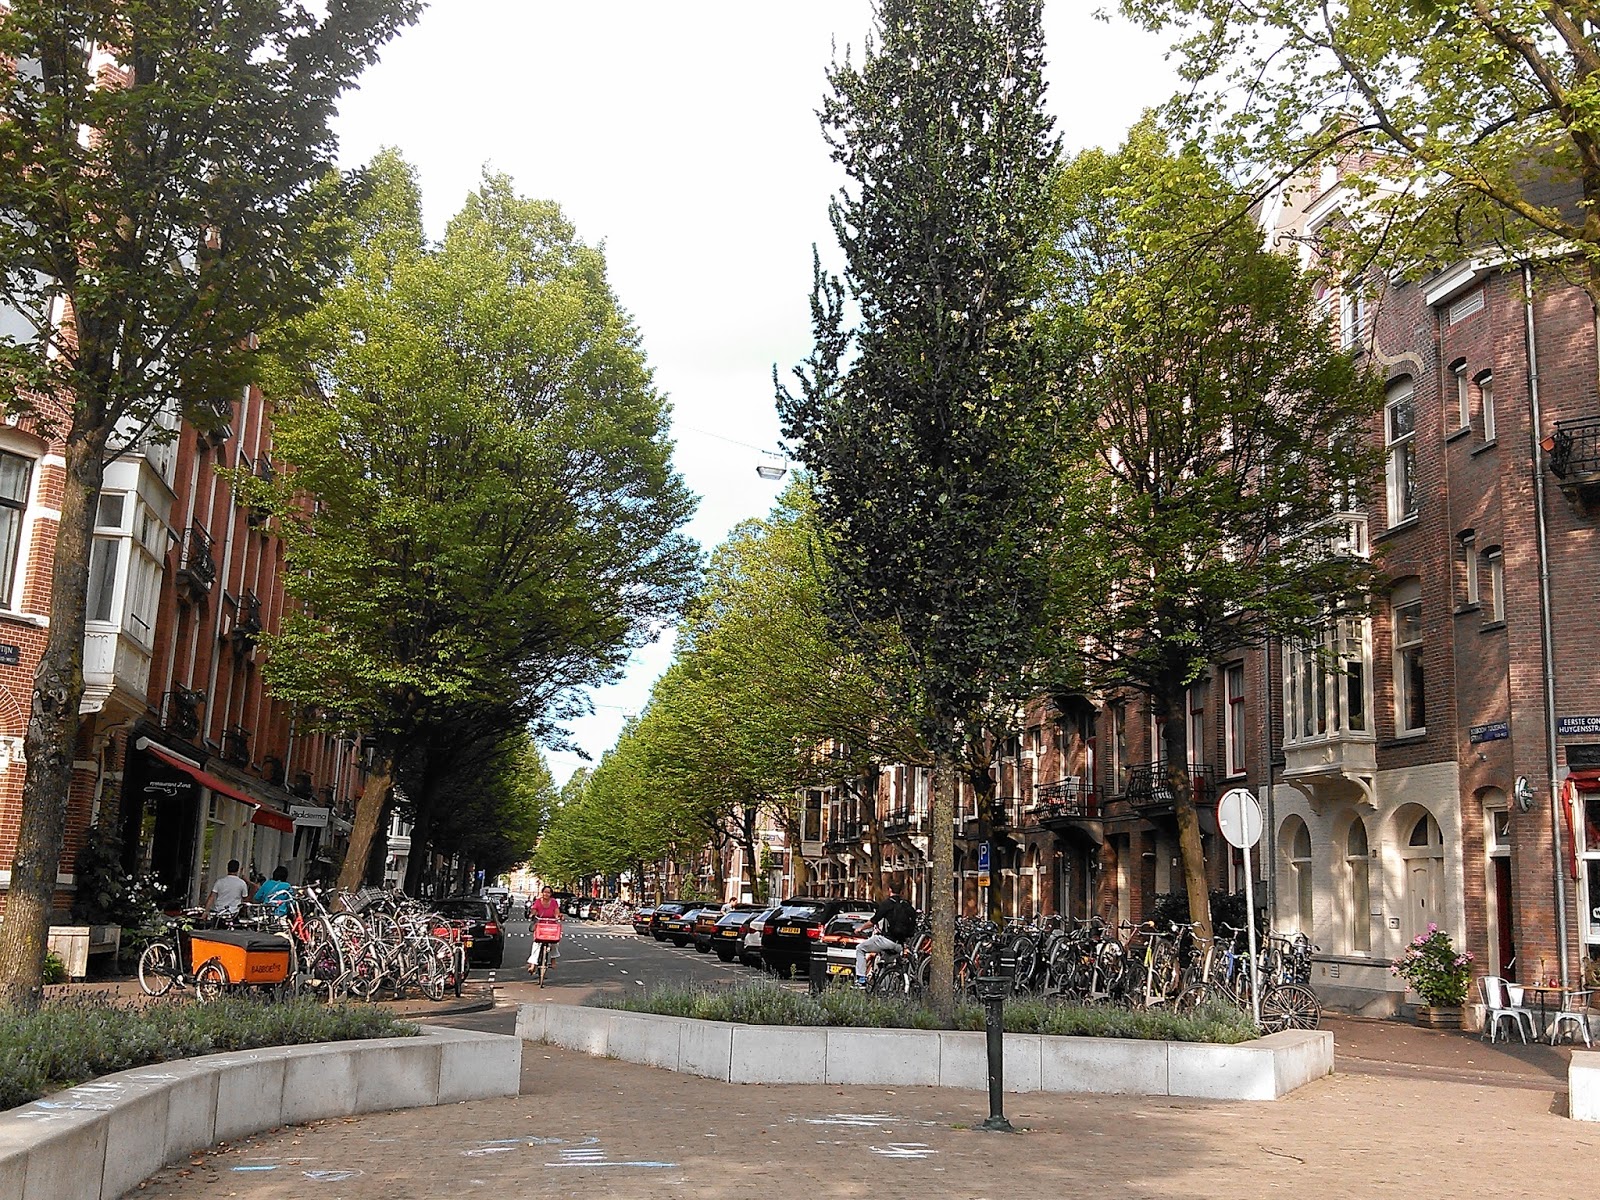
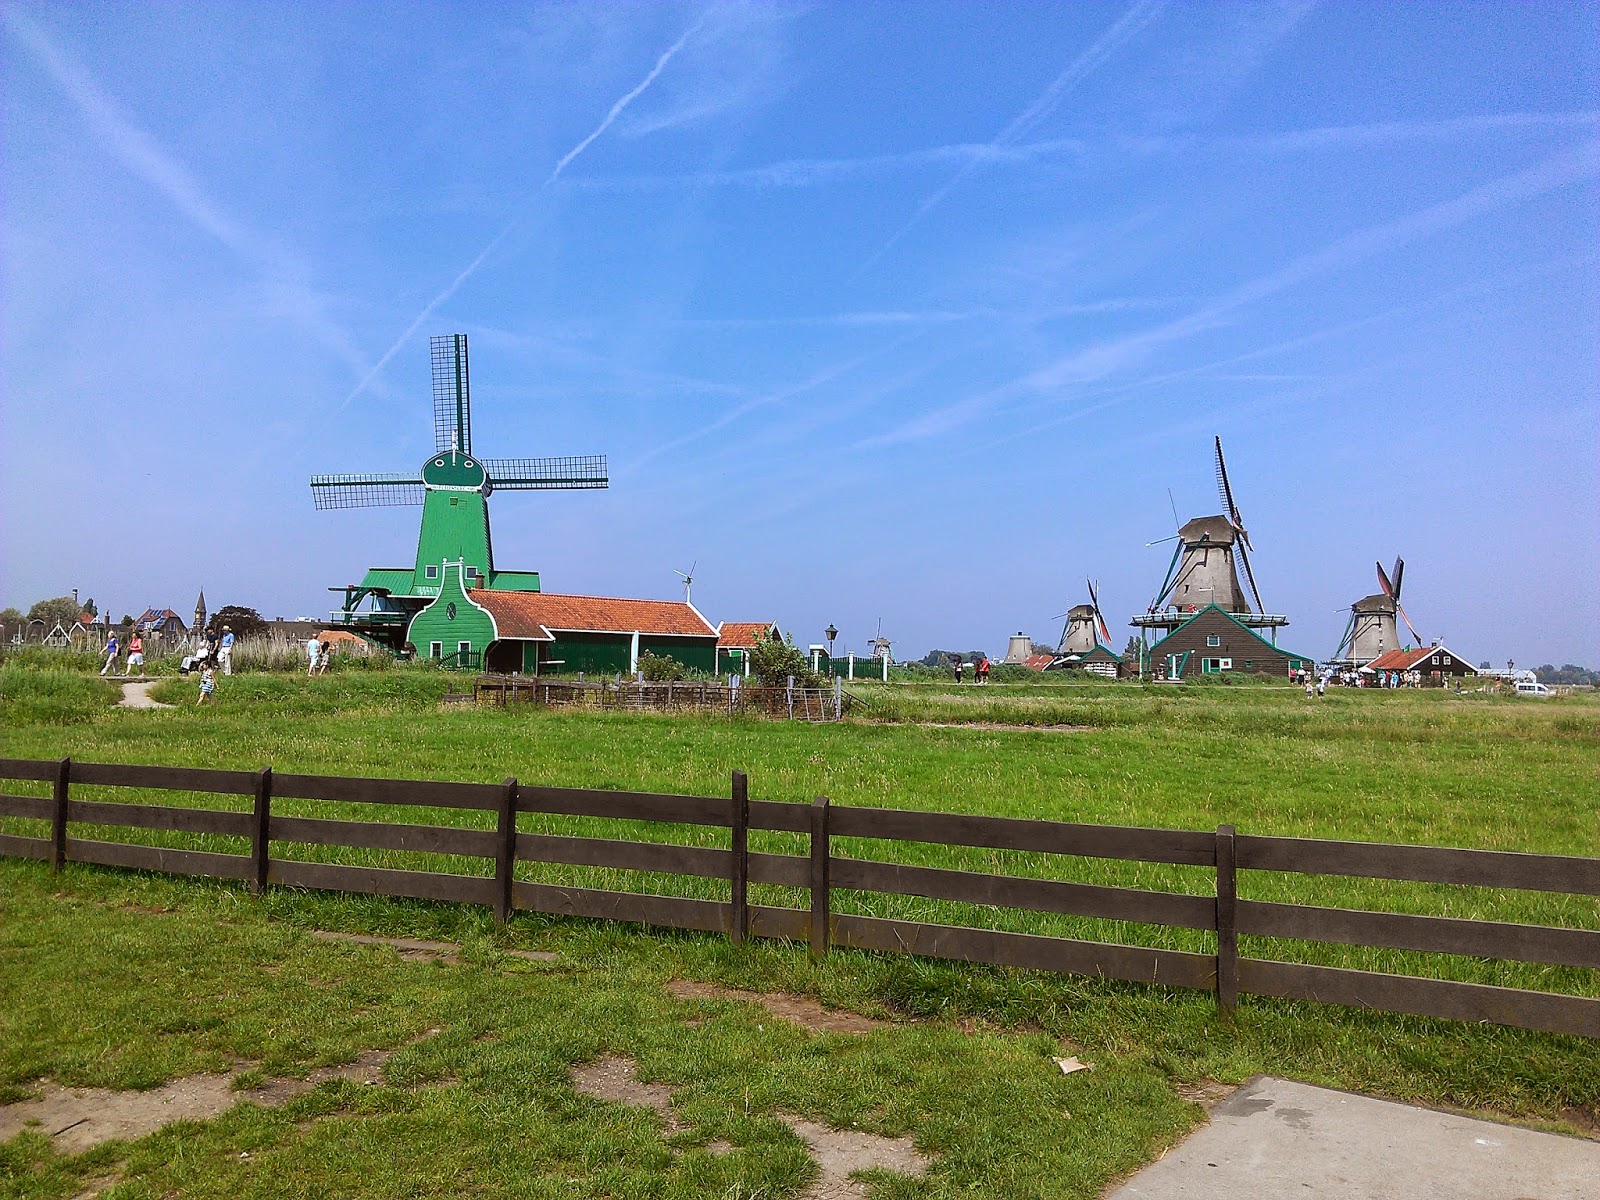
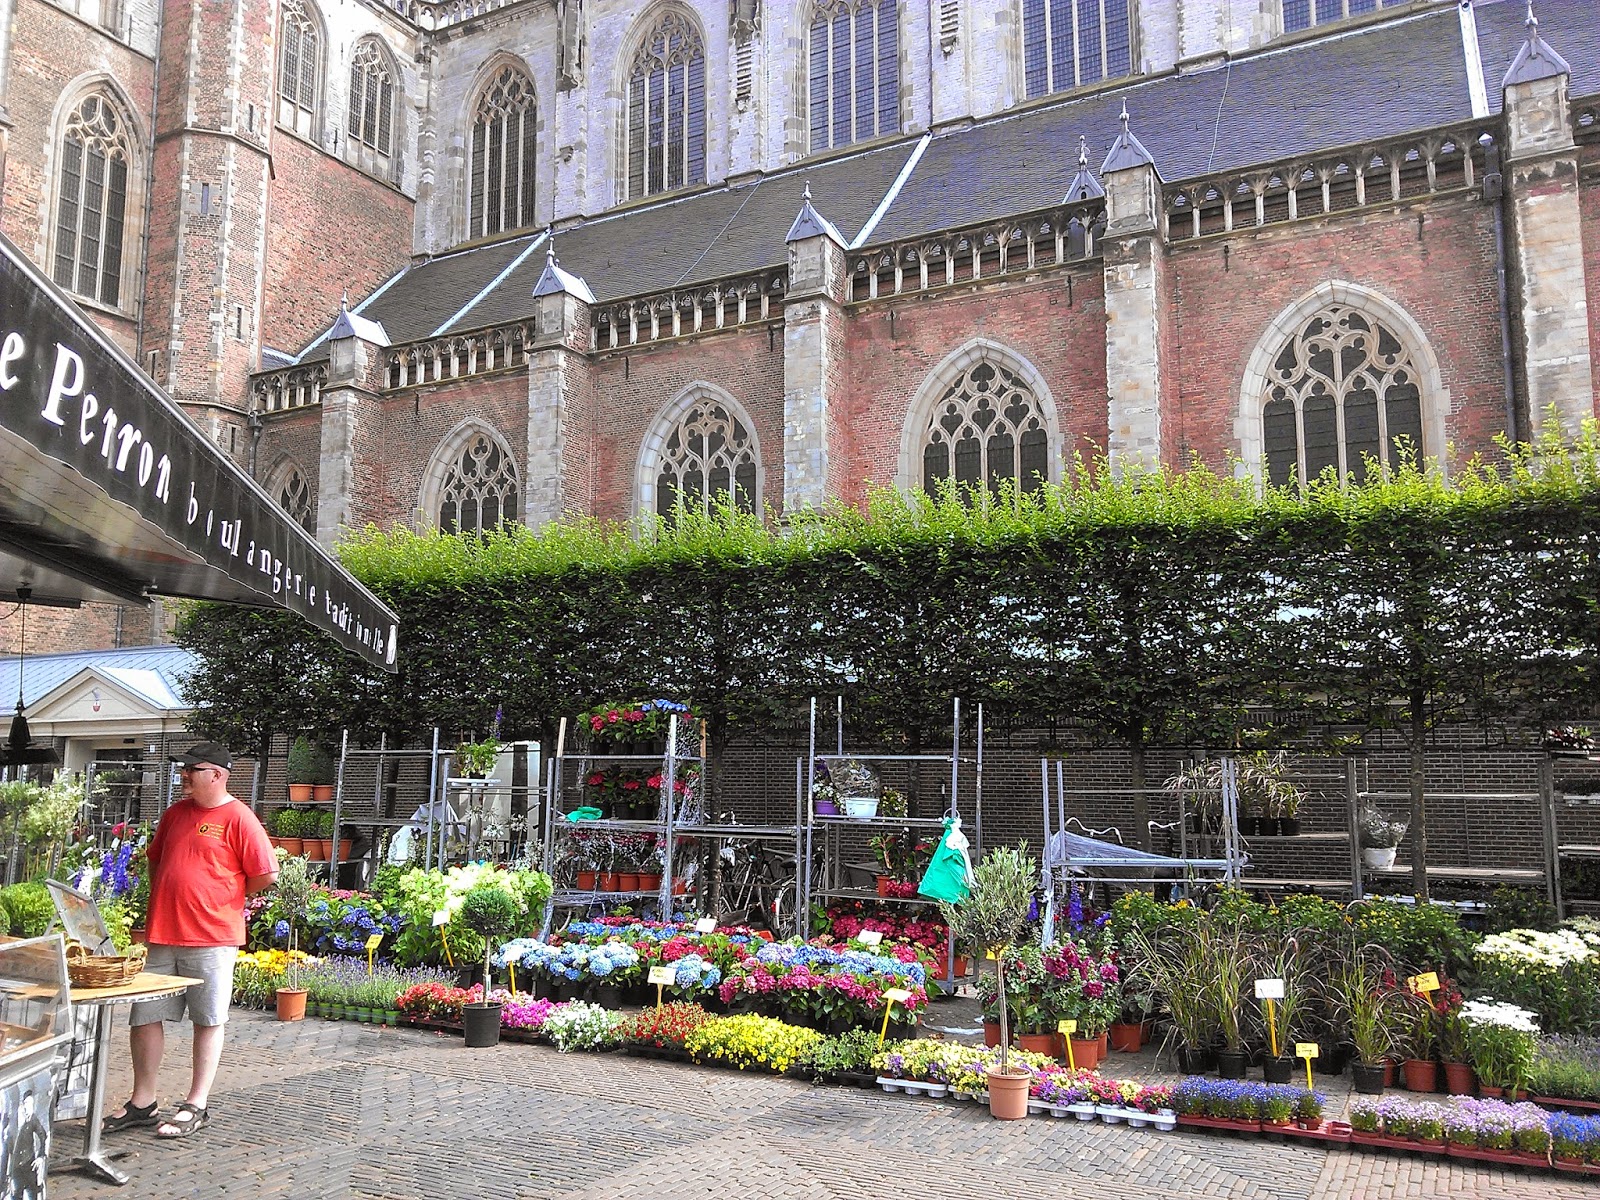
My wife and I enjoy travel, especially in Europe, and for the first time in a few years, we had the time and money this summer to take a European vacation. We chose Amsterdam, because it was one of the big cities we had never visited. While others may try to fit in many locations on a two-week trip, we like to stay local and get to know one or two areas well. We rented an apartment and stayed in Amsterdam except for a couple of quick day-trips to other nearby cities (Haarlem and Zaandam).

We got to experience the FIFA World Cup finals in one of the countries involved. Unfortunately, since the Netherlands' team had lost to Argentina in the semi-finals, they were only playing in the third-place game, which almost no one in Amsterdam cared about. There were a few isolated fireworks after the victory, but most of the city responded with a very clear "meh".

We were greeted with a strong thunderstorm the first night we were there. Since we live in California, we thought this was great fun! Not so much fun was trying to figure out how the windows closed at 3:00 am in an unfamiliar apartment. A few days later it got sunny and hot. The locals we talked to expressed how much they loved the sunny weather; we wished it would get cool and rain again!

Our friends who live in Berlin came to visit us in Amsterdam for a weekend. It was interesting to hear their perspective on how Amsterdam had changed over the years, and how it compared to many of their other favorite cities.

I have already written about our experience using Google+ for photos during our trip. Another conversation I've had with people is about email: "to check or not to check". Do you completely cut off during your vacation, and never look at emails or tweets or other electronic communication that might remind you of work? Or do you stay plugged in and try to keep up? It seems like everyone has their own rationalization for their preferred strategy; here's mine. We had wi-fi in our apartment, and brought our Chromebook along with us, so we could stay in contact with family and friends. I also used that to stay up with emails and other messages, because (a) I wanted to make sure I was aware if there were any true emergencies that popped up, and (b) I didn't want to be overwhelmed with hundreds of emails when I got back. I did NOT immediately respond, or spend as much time with email as I would have at home. But I did set aside an hour or so on two occasions to send quick replies, save emails that I would need later, and delete emails I didn't need. Some people argue that you need to completely disconnect in order to relax on vacation. For me, I was more relaxed knowing that I was keeping on top of my inbox.

End of July - Google Teacher Academy - Mountain View, California
The last of my travels for the summer was to the Googleplex in Mountain View, not too far from San Jose. Google's Education division partners with CUE to put on Google Teacher Academies (GTAs). These are two-day workshops in which teachers work with each other and with Google employees ("Googlers") on all kinds of education topics. The sessions are productive and fun, but they are only held a few times a year, in places all over the world, and are limited to 50-60 teachers at a time. This means they are highly competitive to get in; I had applied twice before and was not accepted before finally getting in to this GTA.

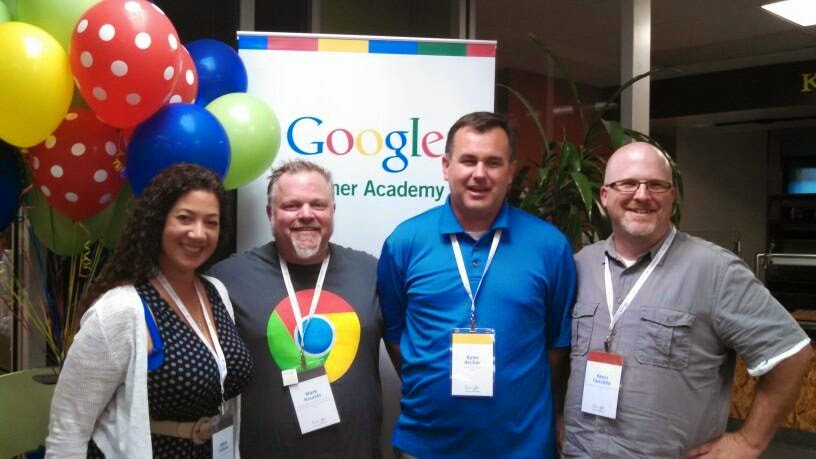
L to R: Adina Sullivan (San Marcos), Mark Rounds (San Diego
Unified), Ryan Archer (San Marcos), and yours truly
Even better, several colleagues and friends, including three from San Diego, also got accepted to this GTA. Despite my surprise that many of them were not already Google Certified Teachers (GCTs), it was great to know that I would already be familiar with a dozen or so participants, leaving fewer than 50 names and faces to learn! That became much easier, though, because the photons had barely left the acceptance emails before a G+ community had been established and online introductions were being passed around. Our group started working together as a team months before ever meeting in person.

In front of the Google Fairchild 1 building, on Fairchild Drive.
The content of the sessions was secondary to the relationships and networks that we built among the group. Still, I did come away with some thoughts about specific tools. I think Google Maps and Maps Engine may be the most under-appreciated app in education. I am pretty familiar with the basics of YouTube, but learned more about channels and settings, which will make it easier for me to share with teachers and students. Googlers told us about the development process, features, and plans for Classroom and for Play for Education, both of which seem to be game-changers for the use of hardware and software in education, in our district anyway. Last but not least, Google Art Project has expanded and is now known as Google Cultural Institute; it includes amazing resources about historical events and world wonders as well as art museums.

One of the requirements of GCTs is that we share what we have learned with other teachers. That's already my job in my district, and I'm signed up to present at three conferences this fall, at minimum, so no problems there. We also are required to put together an action plan that outlines a project we'd like to undertake. The seed for my particular project has been sitting in my brain for a while but started to germinate this summer. I'd like to develop a badge system for teachers' professional learning, taking some of the concepts of micro-credentials and some from gamification, to motivate and reward teachers' everyday accomplishments. I'm still developing the idea; I'm sure you'll read more about it in this blog in the coming months.


Thursday, August 7, 2014

SDUHSD Instructional Technology Vision Draft

Over the last six months, SDUHSD has been engaged in a process to develop a vision for how instructional technology should be implemented in our district. A team of 30 faculty, staff, and administrators developed the following draft, which is now being shared with parents, students, and community groups. The team tried to write a vision that was general enough to be broadly applicable and lasting, yet specific enough to be useful.

The statements below are not yet final and have not been adopted officially by our school board, but we hope that they will be soon. We welcome your comments, either on this blog post or by email to kevin.fairchild@sduhsd.net.


SDUHSD Vision for Educational Technology


The San Dieguito Union High School District uses instructional technology to provide a world-class education that engages students, inspires achievement and service to others, and prepares them to be lifelong learners and responsible members of society.

Strategic Themes

Student Outcomes

Through the use of technology, our students develop the ability to think creatively and critically, evaluate tools and information sources, communicate effectively, and collaborate productively in order to connect with the world and prepare for college and careers.

Instruction

We provide dynamic, engaging, and rigorous learning experiences for all students through the purposeful use of instructional technology as part of our innovative, standards-based curriculum. Teachers continually evaluate the effectiveness of instructional technology through student outcomes.

Citizenship and Safety

We teach and model the importance of online safety and civility, personal responsibility for one’s own digital presence, and shared responsibility of digital citizenship in a global community.

Equity

We ensure relevant, appropriate, and equitable access to technology for all in order to support student success.

Support

We provide ongoing professional development, technical support, and dedicated resources that foster dynamic learning experiences through innovative applications of instructional technology.


Friday, July 25, 2014

Updates on Four Web Tools

Many of the web tools that SDUHSD teachers use have been updated and improved over the summer. Here are some changes for four of those tools: Padlet, Remind101, Today's Meet, and Socrative.


Padlet

  • You'll see a new "Dashboard" that lists Padlet walls you have contributed to or created.
  • You can install a Chrome Extension that lets you add links directly to a wall.
  • There is now a third layout option (Grid), in addition to Freeform and Stream.
  • You can now set up "moderation" on a wall, so you (or someone else) must approve posts before they appear on your wall.
  • How do I embed a Wall on a Google Site?


TodaysMeet


You can still just quickly and easily create a room without signing in, just as you could before. Now, however, if you create a (free) account, you can take advantage of a number of extra features, including:
  • Moderating content
  • More control over how long a room lasts and when it closes
  • Limiting who can join your room


Remind (formerly Remind101)


  • The most obvious change is in the name; apparently they don't need the "101" anymore. This program that lets you safely and securely communicate with students and parents from your phone is a great way to connect with your classes.
  • The other addition is native apps for iOS and Android for use by students and parents. This makes it just a bit easier for them to get their messages all in one place.


Socrative


As of July 12, all Socrative accounts have been updated to version 2.0. (Some of you may have been using this version since October; now it's no longer a choice.) The look and feel of the website has changed, but the basic functions are still the same. The new version also includes:

  • Student Navigation within Quizzes
  • Google Drive Integrations
  • Common Core Tagging
  • Individual Student Reports
  • Printable Quizzes
  • Real-Time Results View


Using Google+ for Vacation Photos

During our recent trip to Amsterdam, my wife and I used Google+ to share photos with family and friends. This was the first time I had tried to use the Photos capability of G+ on the fly, rather than as a bulk upload after an event. There were some parts of the system I loved, others that took some getting used to, and some that just seem terribly designed and still leave me scratching my head. Here are some of my thoughts based on our recent experience.

The Good - Things we loved!

  • Automatic upload from the phone - We set up "Auto Backup" on the first day of the trip and never looked back. Since my wife did 99% of the photography, we set up her phone to automatically upload photos to her G+ account whenever we had wi-fi (which was often, including in our apartment). I was impressed with how quickly and unobtrusively the photos were backed up, and then Julie got a G+ notification whenever it happened. On previous trips, we would have to remember to upload pictures every few days, if at all. I really appreciated this feature when we left her phone in a bar one night. They found it and held it for us, and we got it back a few hours later, but during that time, we had no worries about losing all of our pictures, because we knew they were saved to G+.
  • Sharing an album with those outside G+ - It was easy for our friends and family who do not have G+ accounts to view our pictures. I wasn't sure about this at first; I thought Google might require them to create a G+ account just to see what we shared, but that was not the case. We set up an album that we shared publicly, then just got the link to that album and we could share that however we liked. I sent the link by email to a couple people; I shared it on Facebook, and on Twitter. The link remained pointed to the album even as we added pictures, so our friends and family had just one link to always see our most recent uploads. 
  • Caption and slideshow capabilities - Adding captions to pictures was easy and quick. Our viewers could choose to see a single picture with caption, or view a slideshow of all our pictures. Display options, even for those outside G+, are pretty great.
  • Photo editing capabilities - On the few occasions we need to rotate or crop or slightly edit a picture, we could do it directly from within G+. Nice features, though we didn't use them too often.
The Bad - Things we didn't like but could work around
  • Automatic "filters" and "enhancements" - In the first couple of days, G+ kept randomly "improving" our pictures, with filters and borders and such. If I wanted that, I'd do it myself. We figured out how to turn that feature off: go to "Settings" and scroll down a bit. You'll find checkboxes for "Auto-enhance" and "Auto-awesome". It's not that I don't want those capabilities; I just want to choose when to use them, not have G+ choose them for me.
  • Showing only highlights - It took us a while to get used to the "Highlights" view of photos, and to figure out why we weren't seeing all of our pictures. We learned that we could control the "Highlights" by marking some pictures as highlights and removing others, but overall it seemed pretty useless. Unless you could use the "Highlights" feature with other people (for example, so your family only sees the best pictures instead of every single one), which we could not find a way to do, "Highlights" seems like just another layer to get in the way of seeing our pictures.
  • Adding photos to an album - This seemed more difficult than it needed to be. Here's how we managed to work through it. (1) Photos were auto-uploaded; (2) We had to open our "Amsterdam" album and choose "Add Photos"; (3) We had to scroll through all our photos and select the ones (from memory) that had just been uploaded; (4) Click on "Add Photos". It would have been much easier to simply open the auto-uploaded photos and choose to add them to an album directly from that page. If that capability exists, we couldn't find it.
  • Sharing multiple photos without creating an album - To share only some of our photos, not all of them, we had to create a second album. That meant that after we added our photos to our "Amsterdam" album, we then had to go to our "Amsterdam Shared" album, and go through the entire process of adding photos again. On the one hand, once we did that, access by other people was easy (see "The Good", above.) On the other hand, we really wanted a way to just share some photos in an album, maybe with "highlights" or "stars" or something, and we just didn't find it.


The Ugly - Ugh. Really?
  • Handling multiple accounts - The way G+ handles multiple accounts is terrible. Let's just set aside that I have to have separate G+ accounts for each email address I have and can't merge them. There were two of us on this trip; we've been married for more than 20 years and have shared everything, but we can't share photos in G+ so we can both work on them? In order for me to add photos to an album, edit them, or write captions, I had to log in to Julie's G+ account, even though she had shared the photo albums with my own account. This really needs to work more like Google Docs, where one account can share photos with another and decide the level of access: edit, view, or comment. Right now, that doesn't exist. 
  • Finding albums shared with me - Once her "Amsterdam" photo album had been shared with my account, I expected to see it in my "Photos" section. Wrong. In order to even view those pictures with my account, I had to search and find the post in my stream that announced that she had shared it. At first that wasn't so bad. After a few days, and hundreds of other posts in my stream, it was a major pain. Surely there is a better way to access an album that has been shared with me? Anyone? Bueller?
  • Integration with other Google Apps - Trying to insert a picture from G+ into Gmail, or a Google document, or a Blogger post (like this one) is, again, much harder than it needs to be, considering that all these tools come from Google. This may have to do with the multiple-account issue, or it may just be that development on different tools occurs at different speeds. More than once, though, I found that the best (and sometimes only) way to insert a G+ photo into some other web tool was to download the photo and then re-upload it. (That's so 2006.) Seems like a waste for photos that are already in the cloud. (By the way, does Picasa Web Albums even exist anymore? Is that still a thing? Is it separate from G+ Photos? I can't even tell.)
We loved our trip, and on balance, G+ Photos was a great way to share. As with anything, though, there's room for improvement!